A food meat thermometer is an essential kitchen tool that ensures both food safety and culinary perfection by accurately measuring internal temperatures, preventing foodborne illnesses, and achieving optimal doneness. This precision eliminates guesswork, allowing home cooks to consistently produce delicious, juicy meats without overcooking or undercooking. With over 15 years of culinary experience, I advocate for its use to elevate home cooking from guesswork to gourmet.
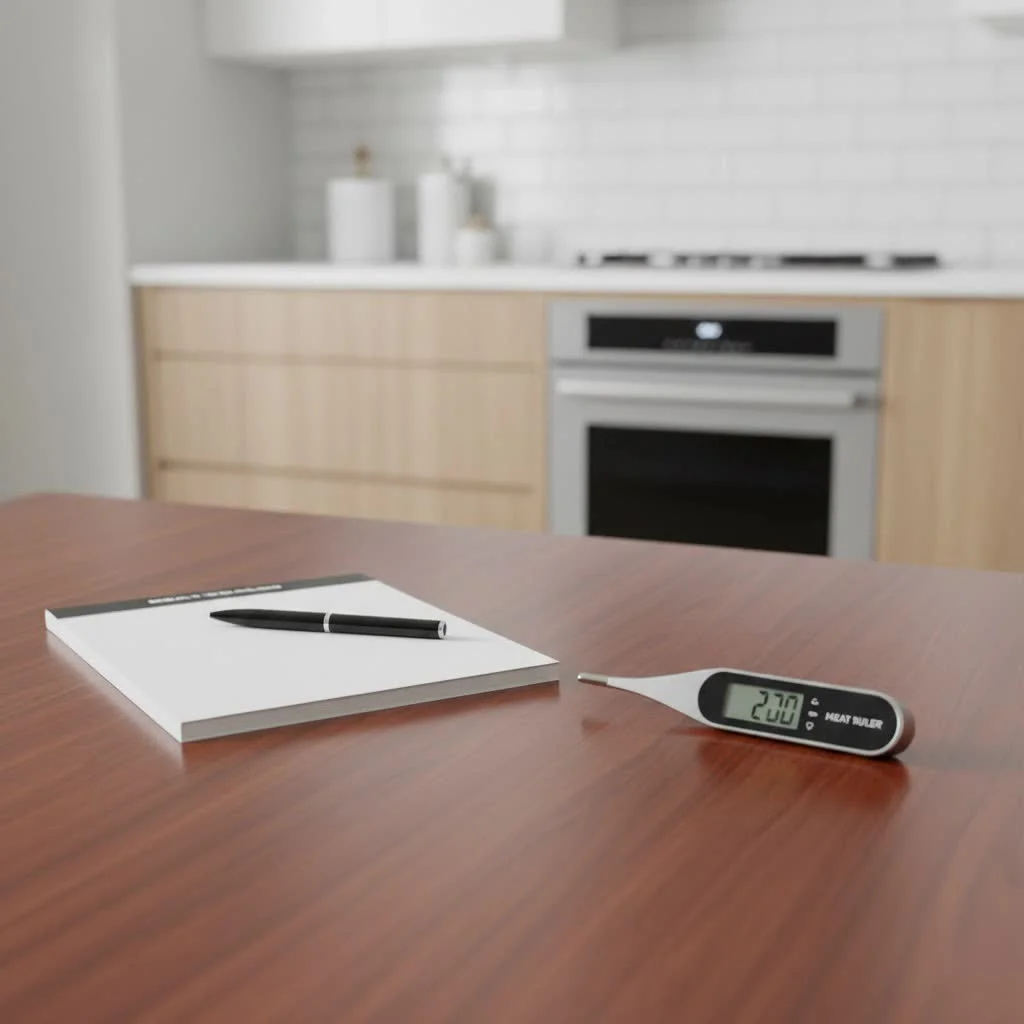
This guide focuses on the fundamental role of a food meat thermometer in preventing foodborne illnesses caused by undercooked meats. My mission at JXSRW.com is to provide professional insights to confidently use this essential gadget, making your kitchen safer and your cooking infinitely better.
Why Every Home Cook Needs a Food Meat Thermometer
Relying on visual cues or “poke tests” for meat doneness is imprecise and risks safety. A food meat thermometer removes all guesswork from cooking.
Beyond “Guesswork”: Ensuring Food Safety
The color of chicken or clear juices from a roast are often misleading indicators. Meat can brown quickly externally while remaining dangerously undercooked internally. A food meat thermometer is the only reliable method to confirm food has reached the safe minimum internal temperature to destroy harmful bacteria like E. coli and Salmonella, effectively preventing foodborne illnesses.
Achieving Culinary Perfection: Optimal Doneness and Juiciness
Beyond safety, a food meat thermometer is key to culinary excellence. It helps achieve perfect doneness—whether medium-rare steak, juicy pork chop, or tender whole chicken. Overcooking dries out meat, sacrificing flavor and texture, and wastes money. Precise temperature readings allow you to remove food from heat at the exact moment, preserving its natural juiciness and flavor.
Navigating the World of Food Meat Thermometers: Types and Their Uses
Understanding the various types of food meat thermometers is crucial for selecting the right tool for specific cooking needs. Each type offers distinct advantages for different culinary scenarios.
Instant-Read Digital Thermometers: Speed and Precision at Your Fingertips
These are popular for home cooks due to their speed and accuracy, providing a reading within seconds, typically accurate to within 1-2 degrees. Simply insert the probe, wait for a stable reading, and remove it.
- Best for: Quick checks on thin cuts like steaks, chops, chicken breasts, or spot-checking roasts. Ideal for grilling and pan-searing.
- Pros: Extremely fast, highly accurate, easy-to-read digital display.
- Cons: Not designed to be left in food during cooking in an oven or on a grill due to potential damage from continuous high heat. Battery-dependent.
Leave-In Digital Probe Thermometers: Your Oven and Grill Companion
These thermometers feature a probe connected by a heat-resistant cable to an external display. The probe remains in the meat throughout cooking, with the display outside the oven or grill. Many models include programmable alarms that alert you when the target temperature is reached.
- Best for: Large roasts, whole poultry, briskets, or any food requiring extended cooking where continuous monitoring is beneficial.
- Pros: Allows constant temperature monitoring without opening the oven or grill, reducing heat loss. Ideal for slow cooking and smoking. Programmable alerts prevent overcooking.
- Cons: Readings can be slightly slower than instant-read models. Cable management can be a minor inconvenience.
Analog (Dial) Thermometers: The Classic, No-Frills Option
|
Our Picks for the Best Meat Thermometer in 2026
As an Amazon Associate I earn from qualifying purchases.
|
||
| Num | Product | Action |
|---|---|---|
| 1 | TRAUSI Instant Read Meat Thermometer, Fast & Accurate Digital Food Thermometer with Backlight, Waterproof & Magnet for Grilling, Cooking, BBQ, Smoker, Baking, and Candy Making Blue |

|
| 2 | 0.5s Instant Read Digital Meat Thermometer, Paysean ±0.5℉ with Auto-Rotating Backlit Display, IP67 Waterproof and Calibration for Cooking, Candy, Grilling, BBQ, Liquid, Smoker, Beef |
|
| 3 | Digital Meat Thermometer, Waterproof Instant Read Food Thermometer for Cooking and Grilling, Kitchen Gadgets, Accessories with Backlight & Calibration for Candy, BBQ Grill, Liquids, Beef, Turkey… |
|
| 4 | ThermoMaven Professional Meat Thermometer Digital, Ultra-Fast 0.5 Sec Instant Read, NIST Certified ±0.5°F Accuracy, 100% Waterproof, Auto-Rotating Backlit Display, Lift-to-Wake, for BBQ/Cooking/Candy |
|
| 5 | Meat Thermometer Digital, Instant Read Meat ThermometerI for Grill and Cooking, Waterproof Food Thermometer for Kitchen and Outside, BBQ, Turkey, Candy, Liquids, Beef |
|
| 6 | Professional 0.5 Sec Instant Read Meat Thermometer Digital, NIST Certified ±0.5℉ Accuracy, Auto Rotate Large LCD Display, Highly Waterproof Cooking Thermometer for Baking Grill BBQ Smoker Oven, Red |
|
| 7 | Meat Thermometer Digital,IP67 Waterproof Thermometer for Cooking with 180° Auto-Rotating LED Display,Fast Instant Read Food thermometers for Grilling, Oven,Candy,Liquids,Beef,BBQ(Black) |
|
| 8 | Alpha Grillers Meat Thermometer Digital - Instant Read Food Thermometer for Cooking and Grilling Gifts for Men Valentines Day Gifts for Him Her Mom Dad |
|
| 9 | Meat Thermometer Digital for Grilling and Cooking - ANDAXIN Waterproof Ultra-Fast Instant Read Food thermometers with Backlight & Calibration for Kitchen, Deep Fry, BBQ, Grill(Red/Black), LCD |
|
| 10 | 0.5 Sec Instant Read Meat Thermometer Digital with ±0.5℉ Precision, Food Thermometer for Cooking Kitchen Gadgets, Oven Grill Candy BBQ Essentials Accessories, Gifts for Him Dad Men Birthday, Red |
|
Analog or bimetallic stemmed thermometers are traditional, featuring a metal stem requiring 2-3 inches of insertion. Temperature is shown on a dial. Some are oven-safe for continuous monitoring of larger cuts.
- Best for: Larger cuts of meat and roasts, especially when continuous monitoring is desired and extreme precision is not the top priority. Some are designed to be oven-safe.
- Pros: No batteries required, generally durable and inexpensive. Many can withstand oven temperatures.
- Cons: Slower readings (up to 1-2 minutes), often less precise than digital models, and can be harder to read accurately. Not suitable for thin foods due to required insertion depth.
Thermocouple Thermometers: Professional-Grade Accuracy
Common in professional kitchens, thermocouple thermometers offer lightning-fast and exceptionally accurate readings. They use two different metals to measure temperature and handle a very wide temperature range.
- Best for: Culinary professionals and serious home cooks who demand ultimate speed and precision for all food types, including very thin items or liquids.
- Pros: Unparalleled speed and accuracy.
- Cons: Generally the most expensive option.
A Note on Infrared Thermometers: Surface Only!
Infrared thermometers measure only the surface temperature of food, making them unsuitable for ensuring the safe internal doneness of meat. Always use a probe-style food meat thermometer for internal temperature readings.
The Art of the Perfect Read: How to Use Your Food Meat Thermometer Correctly
Even the best food meat thermometer requires proper technique for accurate readings, leading to safer, tastier results.
Step 1: Calibration – The Foundation of Accuracy
Calibrate your food meat thermometer before first use and periodically thereafter. An accurate thermometer is crucial for food safety. The simplest method is the ice bath test:
- Fill a glass with crushed ice and cold water. Stir well and let it sit for three minutes.
- Insert your thermometer probe into the center of the ice water, ensuring it doesn’t touch the bottom or sides of the glass.
- Wait for the reading to stabilize. It should read 32°F (0°C).
- If it doesn’t, follow your thermometer’s manufacturer instructions for recalibration. Some analog thermometers have a small nut under the dial that can be adjusted with a wrench. Digital thermometers may have a recalibration button. If it cannot be recalibrated, it’s time for a replacement.
Step 2: Optimal Placement – Hitting the Sweet Spot
Correct thermometer insertion is critical; incorrect placement commonly causes inaccurate readings.
- Thickest Part: Always insert the thermometer into the thickest part of the meat, which cooks slowest and is most critical for safety.
- Avoid Obstacles: Ensure the probe avoids bone, fat, and gristle. Bones conduct heat faster, giving falsely high readings, while fat and gristle cook differently.
- Thin Cuts: For thinner items like burger patties, chicken cutlets, or fish fillets, insert the probe horizontally from the side, angling towards the center to reach the thickest part.
- Insertion Depth: Required depth varies. Dial thermometers often need 2-3 inches for their bimetallic coil sensor. Digital instant-read thermometers typically need about ½ inch for their tip sensor. Always refer to your specific thermometer’s manual.
Step 3: Patience is a Virtue – Waiting for the Stable Reading
Once inserted, allow your food meat thermometer a moment to stabilize. Digital instant-reads provide readings in seconds, but still need a moment. Analog thermometers can take a minute or more. Wait until the number on the display or dial stops moving. For larger cuts, take readings in a couple of different spots to confirm even cooking.
Step 4: The Carryover Effect – Knowing When to Pull Your Meat
Food continues to cook after removal from the heat source, known as “carryover cooking,” causing its internal temperature to rise a few degrees. To account for this, remove meat when it’s 5-10°F (3-6°C) below your desired final temperature, especially for larger cuts and roasts. For example, pull a beef roast at 140°F for a final temperature of 145°F.
Safe Internal Temperatures for Every Cut: Your Essential Doneness Chart
These are USDA-recommended safe minimum internal temperatures. Always allow for a 3-minute rest time for whole cuts of meat (like steaks, roasts, and chops) after removing them from the heat; this redistributes juices and ensures pathogens are killed.
| Food Item | Minimum Internal Temperature |
|---|---|
| Whole Poultry (Chicken, Turkey) | 165°F (74°C) |
| Ground Poultry (Chicken, Turkey) | 165°F (74°C) |
| Poultry Pieces (Breasts, Thighs, Wings) | 165°F (74°C) |
| Ground Meats (Beef, Pork, Lamb) | 160°F (71°C) |
| Fresh Beef, Pork, Veal, Lamb (Steaks, Chops, Roasts) | 145°F (63°C) with a 3-minute rest |
| Fish | 145°F (63°C) |
| Casseroles & Egg Dishes | 160°F (71°C) |
Keeping Your Thermometer in Top Shape: Care, Cleaning, and Troubleshooting
A well-maintained food meat thermometer will serve reliably for years. Here’s how to ensure its longevity and continued accuracy.
Cleaning Your Food Meat Thermometer
Proper cleaning after each use is vital to prevent cross-contamination.
- Wipe the Probe: Immediately after use, wipe the probe with a clean, hot, soapy cloth or a sanitizing wipe.
- Rinse and Dry: Rinse the probe thoroughly and dry it completely.
- Avoid Submerging: Unless your thermometer is specifically rated as fully waterproof, never submerge the entire unit in water. This can damage electronic components. Clean the body with a damp cloth if necessary.
Proper Storage
Store your food meat thermometer in its protective sheath or case when not in use. This protects the probe from damage and keeps it clean, ready for its next culinary adventure.
Common Troubleshooting Tips
Even reliable tools can encounter issues. Here’s how to tackle common food meat thermometer problems:
- Inaccurate Readings: Always start with recalibration using the ice bath method. For digital thermometers, check and replace the battery if needed. Double-check insertion technique—ensure you’re in the thickest part and not touching bone, fat, or gristle.
- Slow Readings (Digital): If your digital instant-read is suddenly slow, the battery might be low, or the sensor could be faulty. Try a fresh battery. If the problem persists, the sensor might be compromised, and it might be time for a new unit.
- Error Messages: Digital thermometers sometimes display error messages. Always consult your specific model’s user manual. Common causes include low battery, sensor issues, or extreme temperatures exceeding its operating range.
Expert Insights from JXSRW.com
“A food meat thermometer is more than just a gadget; it’s a foundational tool for confidence and creativity in the kitchen,” says Chef Anya Sharma, Lead Culinary Educator at JXSRW.com. “It empowers you to take control, not just achieving perfect culinary results, but ensuring every meal you serve is unequivocally safe for your loved ones. It’s the simplest step you can take to improve your cooking game.”
Frequently Asked Questions (FAQ)
Q: Can I leave my food meat thermometer in the meat while it cooks?
A: It depends on the type. Leave-in digital probe thermometers are specifically designed to remain in the meat throughout cooking. Instant-read digital thermometers are generally not oven-safe and should only be used for quick checks. Always check your thermometer’s manufacturer instructions.
Q: How often should I calibrate my meat thermometer?
A: It’s a good practice to calibrate your food meat thermometer periodically, especially if you suspect inaccurate readings, after it’s been dropped, or if it hasn’t been used in a while. At minimum, check its accuracy every few months.
Q: What’s the difference between an instant-read and a leave-in thermometer?
A: An instant-read thermometer gives a quick temperature reading within seconds and is removed after each check. A leave-in thermometer, with its heat-resistant probe and external display, stays in the food throughout the cooking process, often with programmable alarms.
Q: Why is color not a reliable indicator of doneness?
A: Many factors can affect the color of meat, including pH levels, myoglobin concentration, and cooking methods, making it an unreliable visual cue for doneness. Only a food meat thermometer can accurately measure the internal temperature to confirm safety.
Q: My digital thermometer isn’t working, what should I do?
A: First, check and replace the batteries. If that doesn’t solve it, try recalibrating it with the ice bath method. Ensure the probe is clean and undamaged. If issues persist, consult the user manual or consider replacing the unit.
Q: Are there any meats I shouldn’t use a meat thermometer on?
A: While a food meat thermometer is suitable for nearly all cuts of meat, poultry, and fish, it may be impractical for extremely thin slices where accurate insertion is difficult. In such cases, ensuring the meat is cooked until well-done and visibly opaque throughout is key.
Conclusion
Embracing the food meat thermometer is one of the smartest decisions you can make in your culinary journey. It demystifies cooking, eliminates the stress of under or overcooking, and most importantly, guarantees the safety of your meals. From quick weeknight dinners to elaborate holiday feasts, this indispensable tool will empower you to cook with precision, confidence, and flair. At JXSRW.com, we believe that great food starts with great knowledge, and your food meat thermometer is the key to unlocking a world of perfectly cooked, safely prepared delights. Invest in one, learn its ways, and improve your cooking for good!
Frequently Asked Questions
Can I leave my food meat thermometer in the meat while it cooks?
Yes, some food meat thermometers are designed for continuous monitoring. Leave-in digital probe thermometers are specifically made to remain in the meat throughout cooking, while instant-read digital thermometers are generally not oven-safe and should only be used for quick checks. Always consult your specific thermometer's manufacturer instructions to ensure proper use.
How often should I calibrate my meat thermometer for accuracy?
It is good practice to calibrate your food meat thermometer periodically to ensure accuracy. You should check its accuracy every few months, especially if you suspect inaccurate readings, after it has been dropped, or if it hasn't been used in a while. The ice bath method is a simple and effective way to test calibration.
What is the main difference between instant-read and leave-in thermometers?
The main difference lies in their intended use during cooking. An instant-read thermometer provides a quick temperature reading within seconds and is removed after each check, ideal for quick spot checks. A leave-in thermometer, featuring a heat-resistant probe and external display, stays in the food throughout the entire cooking process, often with programmable alarms to alert you when a target temperature is reached.
Why is meat color not a reliable indicator of doneness for safety?
Meat color is not a reliable indicator of doneness because various factors, such as pH levels, myoglobin concentration, and cooking methods, can affect its appearance. Meat can brown quickly on the outside while still being dangerously undercooked internally. Only a food meat thermometer can accurately measure the internal temperature to confirm that harmful bacteria have been destroyed, ensuring food safety.
What should I do if my digital meat thermometer stops working?
If your digital meat thermometer stops working, first check and replace the batteries, as this is a common issue. If that doesn't resolve the problem, try recalibrating it using the ice bath method to ensure its accuracy. Also, ensure the probe is clean and undamaged. If these steps do not fix the issue, consult the user manual for specific troubleshooting or consider replacing the unit.
Are there any specific meats where a thermometer is not recommended?
While a food meat thermometer is suitable for nearly all cuts of meat, poultry, and fish, it may be impractical for extremely thin slices where accurate insertion of the probe is difficult. In such cases, ensuring the meat is cooked until it is visibly well-done and opaque throughout is key to ensuring safety. For most other cuts, a thermometer is highly recommended.
How to Use Your Food Meat Thermometer Correctly
Properly using your food meat thermometer ensures accurate readings, leading to safer and tastier culinary results every time.
Before first use and periodically, calibrate your thermometer using the ice bath test. Fill a glass with crushed ice and cold water, stir, and insert the probe without touching the sides or bottom. It should read 32u00b0F (0u00b0C); recalibrate if it doesn't.
Always insert the thermometer into the thickest part of the meat, avoiding bone, fat, and gristle, which can give inaccurate readings. For thin cuts, insert horizontally from the side, angling towards the center. Refer to your thermometer's manual for specific insertion depth, typically u00bd inch for digital instant-reads.
Once inserted, allow the thermometer time to stabilize. Digital instant-reads take seconds, while analog models may take a minute or more. Do not remove it until the number on the display or dial stops moving. For larger cuts, check multiple spots for even cooking.
Remember that meat continues to cook after being removed from the heat source, known as carryover cooking, causing its internal temperature to rise by 5-10u00b0F (3-6u00b0C). Remove your meat when it is 5-10u00b0F below your desired final temperature to prevent overcooking. For example, pull a beef roast at 140u00b0F for a final temperature of 145u00b0F.
Cooking gear we tested in our own kitchens
Practical specs, not advice. Unsubscribe anytime.
I used to always worry about undercooking chicken, especially for family gatherings. This guide really helped me understand the importance of a good food meat thermometer. I finally invested in one, and my roasts have been perfectly juicy every time. No more guessing or dry meat!
I appreciate the emphasis on food safety, which is why I bought a thermometer. It works okay for basic checks, but I found the response time a little slow compared to what I expected. It gets the job done for preventing foodborne illnesses, but for quick checks on the grill, it’s not as fast as I’d like.
This was exactly what I needed! I’m a relatively new cook and was always intimidated by cooking larger cuts of meat. The explanation about achieving optimal doneness without overcooking was super clear. My last pork loin was the best I’ve ever made, thanks to finally using a thermometer correctly.
Great tips here! I’ve been grilling for years, but sometimes my steaks would still come out a bit overdone. Focusing on the internal temperature rather than just timing has been a game-changer. My only minor complaint is that I wish there were more specific brand recommendations for different price points, but overall, very helpful.