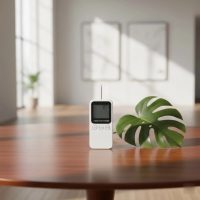
Ever stood over a sizzling steak or a plump roast, wondering if it’s truly done? We’ve all been there. The guesswork of cooking can be stressful, leading to either dry, overcooked disappointments or, worse, undercooked food that poses health risks. That’s where a reliable meat thermometer comes in, transforming you from a hopeful cook into a confident culinary artist. And the good news? You can easily grab an effective tool, like a quality CVS meat thermometer, right from your local pharmacy.

For over 15 years, I’ve been immersed in the world of cooking temperatures and food safety, and I can tell you that a meat thermometer is the unsung hero of any kitchen. It’s not just about perfection; it’s about peace of mind. On jxsrw.com, we champion the use of these vital gadgets, breaking down complex technicalities into simple, actionable advice. Let’s dive into how a CVS meat thermometer can empower your cooking.
Understanding Your Options: What a CVS Meat Thermometer Might Offer (and Beyond)
When you’re looking for a meat thermometer, even at a convenient location like CVS, you’ll find a few main types. Each has its strengths, making them suitable for different cooking styles.
Instant-Read Thermometers: Your Quick-Draw Companion
These are the speed demons of the thermometer world, perfect for quick checks on thinner cuts or when you need a fast reading from your grill or oven. You’ll typically find two sub-types:
- Digital Instant-Read: These are incredibly popular for a reason. They offer fast, precise temperature readings on a clear digital display, often with features like backlights for easy viewing in any light. Many cooks appreciate their ease of use and rapid response time, often delivering an accurate reading within seconds. Products like the GoodCook Instant Read Thermometer, which you can find at CVS, are prime examples of this convenient category.
- Dial (Analog) Instant-Read: While slower and sometimes harder to read than their digital counterparts, these traditional thermometers are still functional and often more budget-friendly. They don’t require batteries, which can be a plus for some. However, for accuracy and speed, digital is usually the way to go.
Probe (Leave-In) Thermometers: The Set-It-and-Forget-It Solution
For larger roasts, slow cooking, or even smoking, a probe thermometer is your best friend. These thermometers are designed with a heat-resistant probe that stays in the meat throughout the cooking process, connected by a wire to an external display unit.
- Wired Probe Thermometers: These allow you to monitor the internal temperature without constantly opening the oven or grill, which helps maintain consistent cooking temperatures. Many come with alarms that sound when your desired temperature is reached, preventing overcooking.
- Wireless/Bluetooth Probe Thermometers: Taking convenience a step further, these high-tech options connect to your smartphone or a separate receiver, allowing you to monitor your meat’s progress from across the room or even outside. While you might not find these advanced models directly branded as a CVS meat thermometer, understanding their capabilities helps you appreciate what’s available more broadly.
“Choosing the right thermometer is like choosing the right knife for the job,” says Sarah Chen, a seasoned culinary instructor and food safety advocate. “For quick checks, an instant-read is invaluable. For long roasts, a leave-in probe frees you up to enjoy your guests.”
Why Every Home Cook Needs a Reliable Meat Thermometer
You might think you can tell if meat is done by its color or texture, but that’s a gamble with both flavor and safety. A meat thermometer eliminates all uncertainty.
Food Safety First: Preventing Foodborne Illnesses
|
Our Picks for the Best Meat Thermometer in 2026
As an Amazon Associate I earn from qualifying purchases.
|
||
| Num | Product | Action |
|---|---|---|
| 1 | 0.5 Sec Instant Read Meat Thermometer Digital with ±0.5℉ Precision, Food Thermometer for Cooking Kitchen Gadgets, Oven Grill Candy BBQ Essentials Accessories, Gifts for Him Dad Men Birthday, Red |

|
| 2 | 0.5s Instant Read Digital Meat Thermometer, Paysean ±0.5℉ with Auto-Rotating Backlit Display, IP67 Waterproof and Calibration for Cooking, Candy, Grilling, BBQ, Liquid, Smoker, Beef |
|
| 3 | Professional 0.5 Sec Instant Read Meat Thermometer Digital, NIST Certified ±0.5℉ Accuracy, Auto Rotate Large LCD Display, Highly Waterproof Cooking Thermometer for Baking Grill BBQ Smoker Oven, Red |
|
| 4 | Meat Thermometer Digital for Grilling and Cooking - ANDAXIN Waterproof Ultra-Fast Instant Read Food thermometers with Backlight & Calibration for Kitchen, Deep Fry, BBQ, Grill(Red/Black), LCD |
|
| 5 | Alpha Grillers Meat Thermometer Digital - Instant Read Food Thermometer for Cooking and Grilling Gifts for Men Valentines Day Gifts for Him Her Mom Dad |
|
| 6 | Meat Thermometer Digital,IP67 Waterproof Thermometer for Cooking with 180° Auto-Rotating LED Display,Fast Instant Read Food thermometers for Grilling, Oven,Candy,Liquids,Beef,BBQ(Black) |
|
| 7 | Digital Meat Thermometer, Waterproof Instant Read Food Thermometer for Cooking and Grilling, Kitchen Gadgets, Accessories with Backlight & Calibration for Candy, BBQ Grill, Liquids, Beef, Turkey… |
|
| 8 | Meat Thermometer Digital, Instant Read Meat ThermometerI for Grill and Cooking, Waterproof Food Thermometer for Kitchen and Outside, BBQ, Turkey, Candy, Liquids, Beef |
|
| 9 | TRAUSI Instant Read Meat Thermometer, Fast & Accurate Digital Food Thermometer with Backlight, Waterproof & Magnet for Grilling, Cooking, BBQ, Smoker, Baking, and Candy Making Blue |
|
| 10 | ThermoMaven Professional Meat Thermometer Digital, Ultra-Fast 0.5 Sec Instant Read, NIST Certified ±0.5°F Accuracy, 100% Waterproof, Auto-Rotating Backlit Display, Lift-to-Wake, for BBQ/Cooking/Candy |
|
Raw meat and poultry can harbor harmful bacteria like Salmonella, E. coli, and Listeria. The only way to ensure these pathogens are destroyed is by cooking food to a specific minimum internal temperature. This isn’t just a suggestion; it’s a critical step in preventing foodborne illnesses that can range from uncomfortable to life-threatening. A simple CVS meat thermometer acts as your frontline defense.
Achieving Perfect Doneness: No More Guesswork
Beyond safety, a meat thermometer is your secret weapon for culinary excellence. Do you prefer your steak medium-rare, or your chicken juicy and tender? Cooking by time alone is notoriously unreliable, as oven temperatures can vary, and meat sizes differ. With a thermometer, you hit that sweet spot of doneness every time, ensuring succulent results without drying out your favorite cuts.
Using Your Meat Thermometer Like a Pro: A Step-by-Step Guide
Using a meat thermometer isn’t complicated, but a few key practices will ensure you get the most accurate readings.
Placement Matters: Where to Insert the Probe
This is arguably the most crucial step. For accurate results, always insert the thermometer probe into the thickest part of the meat, making sure to avoid bones, fat, or gristle. These areas can conduct heat differently and give you an inaccurate reading.
- For Whole Poultry (Chicken, Turkey): Insert into the inner thigh, near the breast, but steer clear of the bone.
- For Roasts, Steaks, or Chops: Aim for the center of the thickest part, away from any bone or large pockets of fat.
- For Ground Meats (Burgers, Meatloaf): Insert into the thickest area. For thinner patties, it’s best to insert the thermometer sideways to ensure the sensing area is fully immersed in the center of the meat.
- For Casseroles and Egg Dishes: Insert into the center or thickest portion.
Remember, the sensing area of most thermometers is usually between ½ inch and 2 inches long, so make sure that entire portion is fully inserted into the food’s core.
Reading the Temperature: What to Look For
Once the probe is correctly inserted, wait for the reading to stabilize. This usually takes a few seconds for instant-read digital thermometers, or a couple of minutes for older dial types. Once the number stops changing, that’s your true internal temperature. If your meat hasn’t reached the desired temperature, simply continue cooking and check again.
The Importance of Rest Time
Here’s a pro tip: for larger cuts of meat like roasts or whole poultry, remove them from the heat source when they are about 5°F below the desired final temperature. This is because meat continues to cook even after it’s removed from the oven or grill, a phenomenon known as “carryover cooking.” This resting period also allows the juices to redistribute throughout the meat, resulting in a more tender and flavorful dish.
Your Go-To Safe Cooking Temperatures Chart
These are the minimum safe internal temperatures recommended by food safety authorities. Always use your CVS meat thermometer to verify.
| Meat Type | Minimum Internal Temperature | Rest Time | Notes |
|---|---|---|---|
| Poultry (Whole, Parts, Ground) | 165°F (74°C) | None | All poultry must reach this temperature. |
| Ground Meats (Beef, Pork) | 160°F (71°C) | None | Ground meats have increased surface area, requiring thorough cooking. |
| Beef, Pork, Veal, Lamb | |||
| Steaks, Roasts, Chops | 145°F (63°C) | 3 minutes | For medium-rare; consumers may cook to higher temps for personal preference. |
| Fish and Shellfish | 145°F (63°C) | None | Or until flesh is opaque and separates easily with a fork. |
| Leftovers & Casseroles | 165°F (74°C) | None | When reheating. |
Note: For ground beef, even if it looks pink, it can be safely cooked to 160°F. Color is not a reliable indicator of doneness. Always trust your CVS meat thermometer.
Keeping Your Thermometer Accurate: Calibration and Care
A thermometer is only useful if it’s accurate. Regular calibration and proper care ensure your CVS meat thermometer remains a reliable kitchen tool.
The Ice Bath Test: A Simple Calibration Method
This is the easiest and most common way to check your thermometer’s accuracy:
- Prepare the Ice Bath: Fill a tall glass with crushed ice, then add cold water until the glass is full. Stir the mixture and let it sit for a couple of minutes to reach a stable 32°F (0°C).
- Insert the Thermometer: Place the thermometer probe into the center of the ice water, ensuring it doesn’t touch the sides or bottom of the glass. The sensing area should be fully submerged.
- Read and Adjust: Wait at least 30 seconds for the reading to stabilize. Your thermometer should read 32°F (0°C).
- Dial Thermometers: If it’s off, you can usually adjust it by turning the nut on the back of the dial with a small wrench or pliers until it reads 32°F.
- Digital Thermometers: Most digital thermometers can’t be manually adjusted. If it’s consistently off by a few degrees, you’ll need to remember that difference when taking readings (e.g., if it reads 30°F, you know it’s 2°F low, so add 2°F to your target temperature). If it’s significantly off, it might be time for a replacement.
It’s a good practice to calibrate your thermometer every few months, or if you suspect it’s been dropped or is giving inconsistent readings.
Cleaning and Storage Tips
After each use, clean your meat thermometer’s probe with warm, soapy water. For digital models, be careful not to immerse the entire unit, especially if it’s not waterproof. An antibacterial wipe can also be effective. Proper cleaning prevents bacterial transfer and keeps your probe functioning optimally. Store it safely, away from heavy utensils that could bend or damage the probe.
Troubleshooting Common Meat Thermometer Issues
Even the best tools can have hiccups. Here’s how to tackle common problems:
Inaccurate Readings
If your thermometer is consistently off despite calibration attempts, ensure the probe is inserted into the thickest part of the meat and not touching bone or fat. If it’s a digital thermometer that can’t be adjusted and the inaccuracy is significant, it might be at the end of its life.
Slow Response
Older dial thermometers are naturally slower. If your digital thermometer is taking an unusually long time to register a temperature, check the battery (if applicable). A weak battery can affect performance. Also, ensure the probe is clean and free of debris that could insulate the sensor.
Battery Life (for Digital Thermometers)
Digital thermometers run on batteries. If your display is dim or erratic, it’s likely time for a battery change. Keeping a spare battery on hand is a smart move, especially before a big cooking project.
Frequently Asked Questions
Q: How often should I calibrate my meat thermometer?
A: For frequent users, aim to calibrate every two to three months. If you use it less often, a seasonal check is usually sufficient. Always calibrate a new thermometer or one that has been dropped.
Q: Can I leave an instant-read thermometer in the oven?
A: No, instant-read thermometers are not designed to be left in the oven during cooking unless explicitly stated by the manufacturer. The high, continuous heat can damage the electronic components. Use them for quick, temporary checks.
Q: What’s the difference between a digital and an analog (dial) thermometer?
A: Digital thermometers typically offer faster and more precise readings on an easy-to-read screen, often with additional features. Analog thermometers use a coiled spring to move a dial, are generally slower, and can be harder to read accurately. Digital is usually preferred for modern cooking.
Q: Why is my meat still pink but at the right temperature?
A: For some meats, particularly uncured red meats like pork or ground beef cooked to 160°F, a pink color can persist even after reaching a safe internal temperature. This can be due to natural pigments or ingredients used (like onions in meatloaf). Always trust the thermometer reading, not the color, for safety.
Q: Are CVS meat thermometers reliable?
A: Thermometers available at CVS, such as the GoodCook models, are generally reliable for home cooking when used correctly and maintained properly. For critical food safety, regular calibration (the ice bath test) is key to ensuring any thermometer’s accuracy.
Conclusion
A meat thermometer is more than just a kitchen gadget; it’s an indispensable tool for food safety, culinary precision, and ultimately, your peace of mind. Whether you pick up an easy-to-use instant-read or a practical probe model, integrating a CVS meat thermometer into your cooking routine will elevate your dishes and protect your loved ones from foodborne illness.
So, go ahead, take control of your cooking temperatures, and confidently serve up perfectly cooked, delicious, and safe meals every time. Your journey to becoming a master of meats starts with this simple, essential tool. What will you cook perfectly next?
Cooking gear we tested in our own kitchens
Practical specs, not advice. Unsubscribe anytime.