Tired of opening the oven door repeatedly to check your roast, letting all that precious heat escape? Or perhaps you’ve pulled a steak off the grill, only to cut into it and find it either overdone or still mooing? If you’ve ever faced these cooking dilemmas, a leave-in meat thermometer is about to become your new best friend. As a seasoned culinary expert with over 15 years in the kitchen, I can tell you that this often-underestimated tool is a game-changer for achieving consistently perfect results and ensuring food safety every single time. It’s not just a gadget; it’s an essential partner for anyone serious about elevating their cooking.
What Exactly is a Leave-In Meat Thermometer?
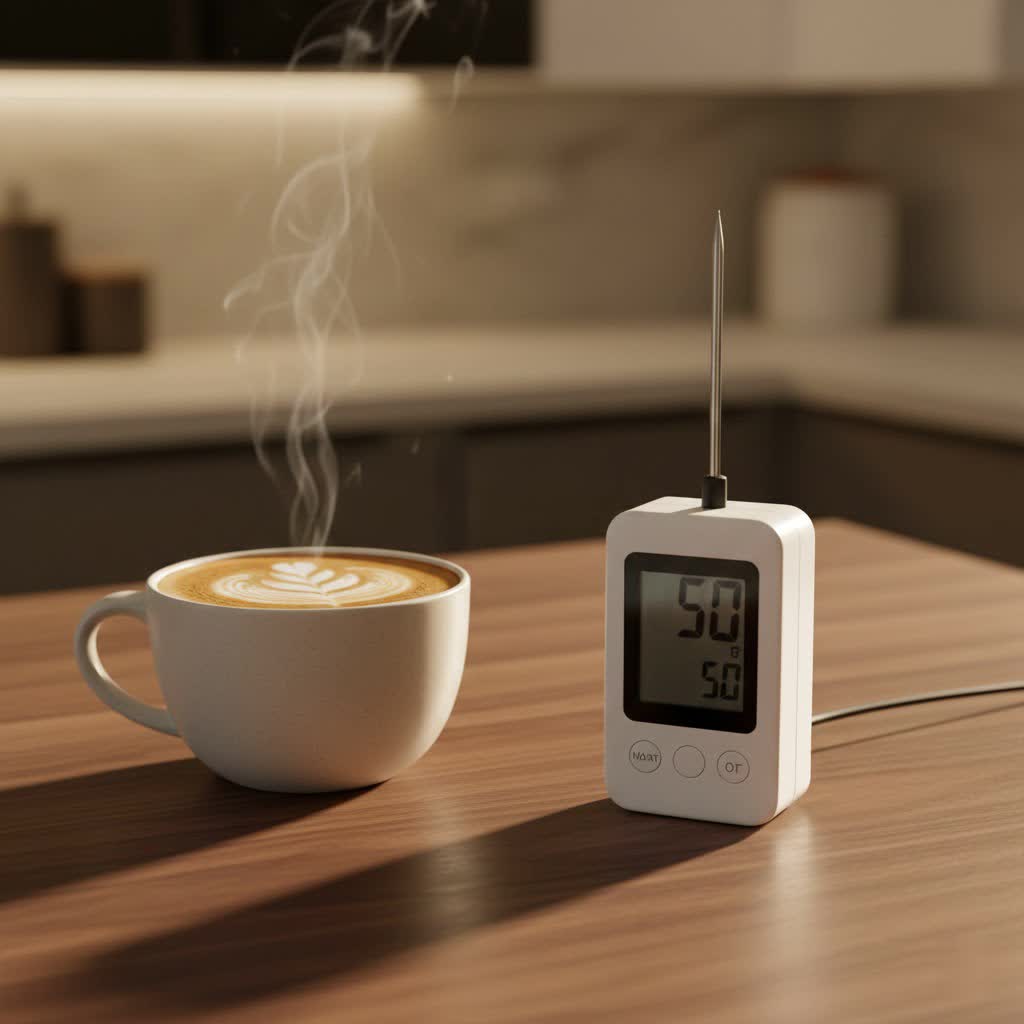
At its core, a leave-in meat thermometer is designed to remain in your food throughout the entire cooking process, continuously monitoring the internal temperature. Unlike instant-read thermometers that give you a quick reading when inserted, a leave-in model provides real-time updates without needing to open your oven, grill, or smoker. This “set it and forget it” functionality is what makes it so incredibly convenient and accurate.
Why Should You Choose a Leave-In Meat Thermometer?
The benefits of using a leave-in meat thermometer are substantial, especially for those longer cooks like roasts, briskets, or whole poultry.
- Hands-Free Monitoring: No more hovering over your food. Insert the probe, set your target temperature, and let the thermometer do the work.
- Consistent Results: Eliminate guesswork. You’ll know the exact moment your food reaches its ideal doneness, preventing overcooking or undercooking.
- Enhanced Food Safety: This is paramount. Cooking meats to their safe internal temperatures is crucial to prevent foodborne illnesses. A leave-in thermometer ensures you hit those critical marks reliably.
- Energy Efficiency: Keep the oven door closed! Each time you open it, you lose heat, extending cooking times and wasting energy.
- Reduced Stress: Enjoy your guests or other meal prep, knowing your main dish is being perfectly monitored.
Exploring the Different Types of Leave-In Meat Thermometers
The world of leave-in meat thermometer technology has evolved significantly. Here are the main types you’ll encounter:
1. Wired Digital Leave-In Thermometers
|
Our Picks for the Best Meat Thermometer in 2026
As an Amazon Associate I earn from qualifying purchases.
|
||
| Num | Product | Action |
|---|---|---|
| 1 | Alpha Grillers Meat Thermometer Digital - Instant Read Food Thermometer for Cooking and Grilling Gifts for Men Valentines Day Gifts for Him Her Mom Dad |

|
| 2 | ThermoMaven Professional Meat Thermometer Digital, Ultra-Fast 0.5 Sec Instant Read, NIST Certified ±0.5°F Accuracy, 100% Waterproof, Auto-Rotating Backlit Display, Lift-to-Wake, for BBQ/Cooking/Candy |
|
| 3 | 0.5s Instant Read Digital Meat Thermometer, Paysean ±0.5℉ with Auto-Rotating Backlit Display, IP67 Waterproof and Calibration for Cooking, Candy, Grilling, BBQ, Liquid, Smoker, Beef |
|
| 4 | Digital Meat Thermometer, Waterproof Instant Read Food Thermometer for Cooking and Grilling, Kitchen Gadgets, Accessories with Backlight & Calibration for Candy, BBQ Grill, Liquids, Beef, Turkey… |
|
| 5 | Professional 0.5 Sec Instant Read Meat Thermometer Digital, NIST Certified ±0.5℉ Accuracy, Auto Rotate Large LCD Display, Highly Waterproof Cooking Thermometer for Baking Grill BBQ Smoker Oven, Red |
|
| 6 | 0.5 Sec Instant Read Meat Thermometer Digital with ±0.5℉ Precision, Food Thermometer for Cooking Kitchen Gadgets, Oven Grill Candy BBQ Essentials Accessories, Gifts for Him Dad Men Birthday, Red |
|
| 7 | Meat Thermometer Digital, Instant Read Meat ThermometerI for Grill and Cooking, Waterproof Food Thermometer for Kitchen and Outside, BBQ, Turkey, Candy, Liquids, Beef |
|
| 8 | Meat Thermometer Digital for Grilling and Cooking - ANDAXIN Waterproof Ultra-Fast Instant Read Food thermometers with Backlight & Calibration for Kitchen, Deep Fry, BBQ, Grill(Red/Black), LCD |
|
| 9 | Meat Thermometer Digital,IP67 Waterproof Thermometer for Cooking with 180° Auto-Rotating LED Display,Fast Instant Read Food thermometers for Grilling, Oven,Candy,Liquids,Beef,BBQ(Black) |
|
| 10 | TRAUSI Instant Read Meat Thermometer, Fast & Accurate Digital Food Thermometer with Backlight, Waterproof & Magnet for Grilling, Cooking, BBQ, Smoker, Baking, and Candy Making Blue |
|
These are perhaps the most common. They feature a durable, heat-resistant probe that’s inserted into the meat, connected by a thin, oven-safe wire to an external digital display unit. The display typically sits outside the oven or grill, showing you the temperature progress. Many models come with pre-programmed settings for different meats and doneness levels, along with customizable alarms.
2. Wireless Digital Leave-In Thermometers
Taking convenience up a notch, wireless models eliminate the wire connecting the probe to the display. Instead, they use Bluetooth or radio frequency (RF) technology to transmit temperature data to a separate receiver or even directly to your smartphone via an app. This allows you to monitor your cook from across the kitchen, or even from another room, without being tethered to the cooking appliance. “Wireless models offer unparalleled freedom, allowing home cooks to mingle with guests or prepare side dishes without constantly checking the oven,” explains Chef Isabella Rossi, a renowned culinary instructor.
3. Smart Thermometers
These are the cutting edge, often a subset of wireless thermometers, featuring advanced functionalities. They typically connect to a smartphone app, providing detailed graphs of temperature progression, estimated cook times, and smart alerts. Some even have multiple probes to monitor different cuts of meat simultaneously or track ambient oven temperature.
How to Use Your Leave-In Meat Thermometer for Perfect Results
Mastering your leave-in meat thermometer is key to culinary success. Follow these steps for consistently delicious and safe meals:
1. Correct Probe Placement
Where you insert the probe is critical for an accurate reading.
- Thickest Part: Always insert the probe into the thickest part of the meat, avoiding bone, gristle, or large pockets of fat. These can conduct heat differently or give inaccurate readings.
- Center: The tip of the probe should rest in the very center of the thickest part. If it goes all the way through or is too close to the surface, it won’t reflect the true core temperature.
- Avoid Bone: Bones can heat up faster than muscle, giving a false high reading.
2. Setting Your Target Temperature
Most leave-in thermometers allow you to set a desired final temperature.
- Consult a reliable food safety chart (like the one below) for the recommended safe internal temperature for your specific meat.
- Remember that meat continues to cook after it’s removed from the heat (carryover cooking). For larger cuts, you might want to pull it 5-10°F below your target to account for this.
3. Monitoring During Cooking
Once the probe is in and the temperature is set, place your meat in the oven, on the grill, or in the smoker. Position the external display or receiver where you can easily see it. Many units will sound an alarm when your target temperature is reached.
4. Resting the Meat
This step is just as important as cooking. Once your meat reaches its target temperature, remove it from the heat source and let it rest for 10-20 minutes (depending on the size). This allows the juices to redistribute, resulting in a more tender and flavorful product. Your leave-in meat thermometer can stay in during this period to show you the temperature rise from carryover cooking and then the gradual cooling.
Safe Internal Temperatures for Common Meats
Ensuring food safety is non-negotiable. Here’s a quick reference for minimum safe internal temperatures:
| Meat Type | Minimum Internal Temperature | Why It Matters |
|---|---|---|
| Chicken & Poultry (whole or ground) | 165°F (74°C) | Essential to kill salmonella and other bacteria. |
| Ground Meats (beef, pork, lamb) | 160°F (71°C) | Ensures harmful bacteria are eliminated. |
| Beef, Pork, Veal, & Lamb (steaks, roasts, chops) | 145°F (63°C) (with a 3-minute rest) | For medium-rare doneness while ensuring safety. |
| Fish | 145°F (63°C) | Ensures proper cooking and texture. |
| Leftovers & Casseroles | 165°F (74°C) | For reheating to a safe consumption temperature. |
Always verify with up-to-date food safety guidelines for your region.
Factors Affecting the Accuracy of Your Leave-In Meat Thermometer
Even the best leave-in meat thermometer can give inaccurate readings if certain factors aren’t considered.
1. Probe Placement Errors
As discussed, improper placement (hitting bone, fat, or being too shallow/deep) is the number one cause of inaccurate readings. Take your time to ensure the tip is in the thermal center of the thickest part.
2. Calibration Issues
Over time, or with extreme temperature changes, thermometers can become uncalibrated. A simple ice bath test (should read 32°F / 0°C) or boiling water test (should read 212°F / 100°C at sea level) can help you check its accuracy. Many digital models allow for re-calibration.
3. Battery Life
Low batteries can lead to inconsistent or inaccurate temperature displays, or the unit simply shutting off unexpectedly. Always keep fresh batteries on hand for battery-powered models.
4. Probe Damage
Kinks, bends, or visible damage to the probe wire or tip can compromise its ability to read temperatures correctly. Handle probes with care and inspect them regularly.
Care and Maintenance for a Long-Lasting Thermometer
A little care goes a long way in ensuring your leave-in meat thermometer serves you for years.
- Cleaning:
- Probes: Always wipe down and wash probes with warm, soapy water immediately after use. Avoid submerging the entire probe in water if it’s not explicitly labeled as fully submersible.
- Display Units: Wipe display units with a damp cloth; never submerge them.
- Avoid Abrasives: Do not use abrasive scrubbers or harsh chemicals, which can damage the probe’s sensor or the unit’s exterior.
- Storage: Store your thermometer in a clean, dry place. Many probes come with a sheath to protect the tip. Keep wires untangled and free from kinks.
- Battery Replacement: Replace batteries as recommended by the manufacturer, or when the low battery indicator appears. Remove batteries if storing the unit for an extended period to prevent corrosion.
Troubleshooting Common Issues with Your Leave-In Meat Thermometer
Even the most reliable tools can occasionally present hiccups. Here’s how to address common problems:
1. Inaccurate Readings
- Check Probe Placement: Re-insert the probe, ensuring it’s in the thickest part of the meat and away from bone or fat.
- Calibrate: Perform an ice bath or boiling water test to check calibration. Re-calibrate if necessary.
- Inspect Probe: Look for any visible damage to the probe or wire.
- Check Batteries: Replace old batteries with new ones.
2. Connectivity Problems (for Wireless Models)
- Distance: Ensure your receiver or phone is within the recommended range of the transmitter.
- Obstructions: Walls, large metal objects, or other electronic devices can interfere with the signal. Try moving closer or repositioning the unit.
- Pairing: Unpair and re-pair the thermometer with your receiver or smartphone app.
- App Updates: Make sure your thermometer’s app is updated to the latest version.
3. Probe Not Working
- Connection: Ensure the probe is fully and securely plugged into the display unit or transmitter.
- Damage: If there’s visible damage, the probe may need to be replaced. Many manufacturers sell replacement probes separately.
- Compatibility: If using a third-party probe, ensure it’s compatible with your thermometer model.
Frequently Asked Questions About Leave-In Meat Thermometers
Q1: Can I use a leave-in thermometer in a smoker or on a grill?
Absolutely! Most leave-in meat thermometer probes are designed to withstand the high temperatures of smokers and grills. They are excellent for monitoring long, slow cooks like briskets, pork shoulders, or whole chickens, ensuring consistent heat management and perfect doneness.
Q2: How do I calibrate my leave-in meat thermometer?
The simplest method is the ice bath test: Fill a glass with crushed ice and cold water, stir, then insert your probe without touching the sides or bottom. It should read 32°F (0°C). If it doesn’t, follow your thermometer’s manual for calibration instructions; many digital models have a calibration function.
Q3: What’s the best type of leave-in meat thermometer for grilling?
For grilling, a wireless digital leave-in meat thermometer is often preferred. It allows you to monitor the internal temperature from a safe distance, preventing you from having to stand directly over the hot grill. Look for models with durable, long-cable probes and strong wireless connectivity.
Q4: Are wireless leave-in thermometers reliable?
Yes, modern wireless leave-in thermometers are highly reliable. Advances in Bluetooth and RF technology mean stable connections and accurate readings, often with ranges that allow you to move freely around your home. However, like any electronic device, signal interference can occasionally occur, so always be mindful of range and potential obstructions.
Q5: Can the leave-in meat thermometer stay in the meat during resting?
Yes, it can. In fact, leaving the thermometer in during the resting phase can be beneficial, as it allows you to observe the phenomenon of “carryover cooking,” where the internal temperature continues to rise slightly after being removed from the heat source. This helps you understand how much residual heat impacts your final doneness.
Conclusion
Embracing the leave-in meat thermometer is more than just buying a new kitchen gadget; it’s adopting a smarter, safer, and undeniably more delicious way to cook. From ensuring food safety to achieving that coveted perfect doneness every single time, this tool empowers you to cook with confidence and precision. Whether you’re roasting a holiday turkey, grilling a weekend feast, or smoking a savory brisket, a reliable leave-in thermometer will be your most trusted ally. So, take the guesswork out of your cooking, invest in quality, and elevate your culinary game today. Your taste buds—and your guests—will thank you!