A meat and oven thermometer is a crucial tool for achieving perfectly cooked and safe meals, eliminating guesswork by providing precise internal temperature readings. It ensures food reaches minimum safe temperatures, like 165°F (73.9°C) for poultry, and helps prevent overcooking, resulting in consistently juicy and flavorful dishes. Understanding its proper use, including strategic probe placement and accounting for carryover cooking, is essential for culinary success.
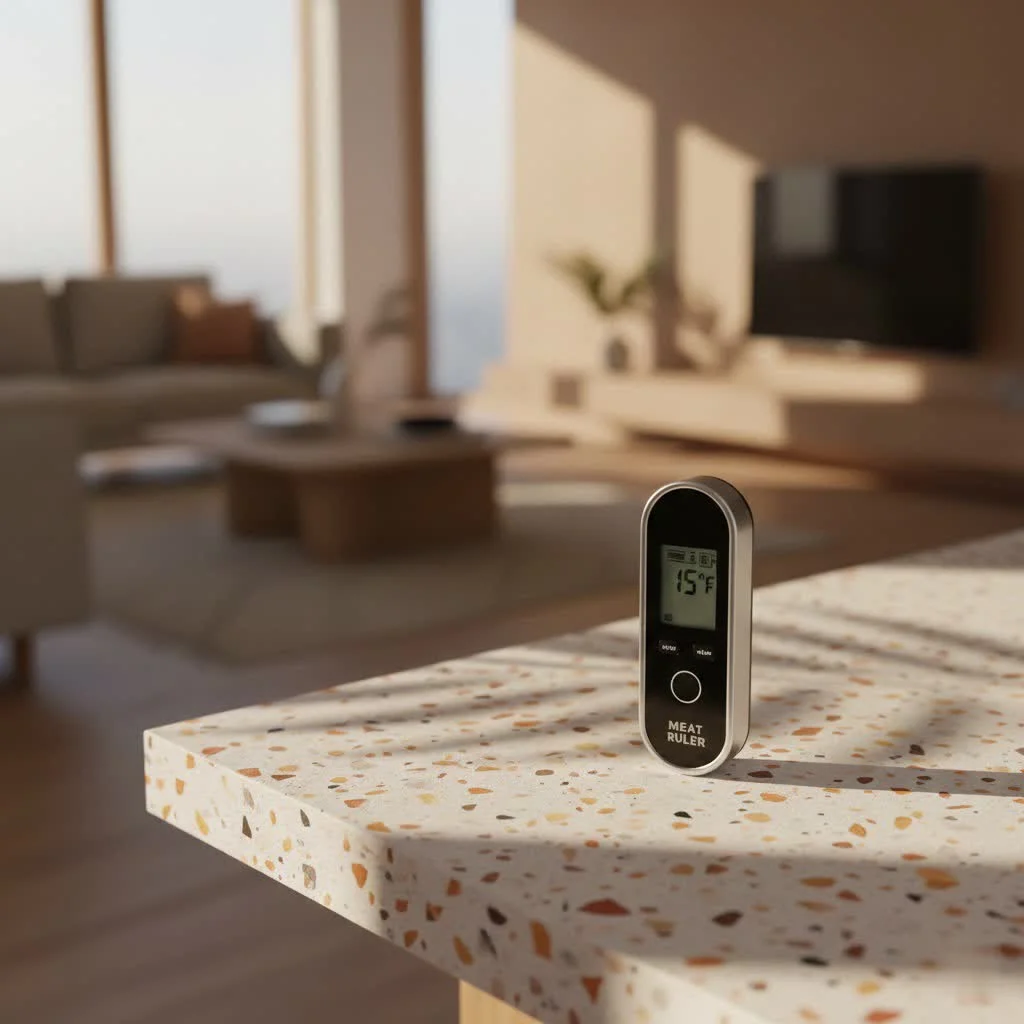
This comprehensive guide will explore various types of meat and oven thermometers, detail how to use them accurately for any cut of meat, clarify safe internal temperatures, and provide essential maintenance and troubleshooting tips. Get ready to improve your cooking! For expert meat thermometers reviews on this site.
Why a Meat and Oven Thermometer is Your Kitchen MVP
In cooking, precision is paramount. Recipes offer guidelines, but factors like oven inconsistencies, meat thickness, and starting temperature can significantly alter cooking times. This is where your thermometer becomes an invaluable ally.
First and foremost, it’s about food safety. Harmful bacteria can lurk in undercooked meats, leading to foodborne illnesses. A reliable thermometer ensures your food reaches the minimum internal temperature required to eliminate these risks, protecting you and your loved ones. Beyond safety, it’s about consistent quality. No one wants a tough, dry chicken breast or a flavorless, overdone steak. By accurately monitoring temperature, you can pull your proteins at their peak doneness, preserving juices and flavor. It removes the stress of wondering if your meal is cooked through, allowing you to enjoy the process and the delicious outcome.
Decoding the Thermometer World: Types You Need to Know
The market offers a range of meat and oven thermometers, each designed for specific cooking scenarios. Knowing the strengths and limitations of each type is key to choosing the right tool for the job.
Instant-Read Thermometers
These are your quick-draw heroes for checking temperatures rapidly. As the name suggests, they provide a reading in a matter of seconds, making them perfect for checking individual cuts like steaks, chops, or chicken breasts as they come off the grill or stovetop.
- Digital Instant-Read: Often battery-operated, these offer fast, precise digital readouts. They are ideal for quick spot-checks.
- Analog Instant-Read: Traditional dial thermometers that don’t require batteries. While reliable, they typically take a bit longer to register a stable temperature and are generally less precise than their digital counterparts.
It’s crucial to that instant-read thermometers are not designed to be left in food during cooking in an oven or on a grill. The delicate internal components can be damaged by prolonged high heat.
Leave-In Probe Thermometers
|
Our Picks for the Best Meat Thermometer in 2026
As an Amazon Associate I earn from qualifying purchases.
|
||
| Num | Product | Action |
|---|---|---|
| 1 | Meat Thermometer Digital,IP67 Waterproof Thermometer for Cooking with 180° Auto-Rotating LED Display,Fast Instant Read Food thermometers for Grilling, Oven,Candy,Liquids,Beef,BBQ(Black) |

|
| 2 | 0.5s Instant Read Digital Meat Thermometer, Paysean ±0.5℉ with Auto-Rotating Backlit Display, IP67 Waterproof and Calibration for Cooking, Candy, Grilling, BBQ, Liquid, Smoker, Beef |
|
| 3 | TRAUSI Instant Read Meat Thermometer, Fast & Accurate Digital Food Thermometer with Backlight, Waterproof & Magnet for Grilling, Cooking, BBQ, Smoker, Baking, and Candy Making Blue |
|
| 4 | Meat Thermometer Digital for Grilling and Cooking - ANDAXIN Waterproof Ultra-Fast Instant Read Food thermometers with Backlight & Calibration for Kitchen, Deep Fry, BBQ, Grill(Red/Black), LCD |
|
| 5 | Professional 0.5 Sec Instant Read Meat Thermometer Digital, NIST Certified ±0.5℉ Accuracy, Auto Rotate Large LCD Display, Highly Waterproof Cooking Thermometer for Baking Grill BBQ Smoker Oven, Red |
|
| 6 | Meat Thermometer Digital, Instant Read Meat ThermometerI for Grill and Cooking, Waterproof Food Thermometer for Kitchen and Outside, BBQ, Turkey, Candy, Liquids, Beef |
|
| 7 | Alpha Grillers Meat Thermometer Digital - Instant Read Food Thermometer for Cooking and Grilling Gifts for Men Valentines Day Gifts for Him Her Mom Dad |
|
| 8 | ThermoMaven Professional Meat Thermometer Digital, Ultra-Fast 0.5 Sec Instant Read, NIST Certified ±0.5°F Accuracy, 100% Waterproof, Auto-Rotating Backlit Display, Lift-to-Wake, for BBQ/Cooking/Candy |
|
| 9 | 0.5 Sec Instant Read Meat Thermometer Digital with ±0.5℉ Precision, Food Thermometer for Cooking Kitchen Gadgets, Oven Grill Candy BBQ Essentials Accessories, Gifts for Him Dad Men Birthday, Red |
|
| 10 | Digital Meat Thermometer, Waterproof Instant Read Food Thermometer for Cooking and Grilling, Kitchen Gadgets, Accessories with Backlight & Calibration for Candy, BBQ Grill, Liquids, Beef, Turkey… |
|
For roasts, whole poultry, or anything that spends a good amount of time in the oven or smoker, a leave-in probe thermometer is indispensable. These feature a heat-safe probe that stays inserted in the meat throughout the cooking process, connected by a wire to a display unit that sits outside the heat source.
- Wired Probe Thermometers: These are highly accurate and reliable as they don’t depend on wireless signals. They’re generally more affordable and excellent for oven roasting or smoking where the display can sit on a countertop nearby.
- Pros: High accuracy, consistent readings, budget-friendly.
- Cons: Wires can be a bit cumbersome, requires you to be near the display.
- Wireless Probe Thermometers: Offering ultimate convenience, these probes communicate with a base unit or a smartphone app via Bluetooth or Wi-Fi. This allows you to monitor your cook from across the room or even outside the house.
- Pros: Freedom of movement, remote monitoring, often include programmable alarms and historical data tracking.
- Cons: Higher cost, potential for signal interference or dropouts, battery reliance for both probe and receiver.
As Sarah Chen, a seasoned culinary technologist at JXSRW, often says, “For long cooks, a good wired or wireless probe thermometer is like having a watchful co-pilot in your kitchen. It frees you up to focus on other aspects of your meal without constantly opening the oven door and losing heat.”
Oven Thermometers (Ambient)
Distinct from meat thermometers, an oven thermometer measures the air temperature inside your oven. Many home ovens have inaccurate built-in thermostats, sometimes off by 25-50°F. An independent oven thermometer, typically a simple dial or digital display that hangs from a rack, helps you verify and adjust your oven’s temperature for consistent baking and roasting.
Other Types
You might encounter other specialized thermometers, such as infrared thermometers (great for measuring surface temperatures quickly but not internal doneness) or older bimetallic coil thermometers (often found in traditional oven-safe leave-in models, but can be slower and less precise than digital probes).
The Art of Precision: How to Use Your Thermometer Correctly
Using a meat and oven thermometer isn’t just about sticking it in; it’s about strategic placement and timing to get the most accurate reading and, ultimately, the best results.
Where to Insert the Probe
This is perhaps the most critical step. For the most accurate reading, always insert the thermometer probe into the thickest part of the meat, making sure to avoid bones, fat, or gristle. Bones can conduct heat faster, leading to an artificially high reading, while fat and gristle don’t cook to the same internal temperature as muscle tissue.
- Roasts (Beef, Pork, Lamb): Insert the probe into the center of the thickest part. If it’s an uneven cut, take multiple readings in different thick spots.
- Whole Poultry (Chicken, Turkey): Check the innermost part of the thigh, near the breast but not touching bone, and also the thickest part of the breast.
- Thinner Cuts (Burgers, Chicken Breasts, Fish Fillets): Insert the probe horizontally through the side of the meat until the tip reaches the very center.
For oven thermometers, simply hang it from an oven rack, preferably near where your food will be, but away from heating elements.
When to Take Readings
Timing is everything. For instant-read thermometers, begin checking the temperature about 10-15 minutes before the estimated cooking time is complete. This proactive approach helps prevent overcooking. For leave-in probe thermometers, set your desired target temperature alarm, and the thermometer will alert you when it’s reached.
Understanding Carryover Cooking and Resting
This is a major upgrade for juicy, tender meats. When you remove meat from the heat source, its internal temperature will continue to rise for several minutes due to residual heat, a phenomenon known as “carryover cooking.”
To account for this, you should typically remove meat from the oven or grill when it’s 5-10°F below your target final temperature. Then, allow the meat to rest for at least 5-15 minutes (depending on its size) before carving. Resting allows the juices, which have been pushed to the center by the heat, to redistribute throughout the meat. This results in a more uniformly juicy and flavorful product. If you cut into it too soon, those precious juices will simply run out onto your cutting board.
Your Safety Net: USDA Recommended Internal Temperatures
Food safety authorities, like the USDA, provide clear guidelines for minimum safe internal temperatures to ensure harmful bacteria are destroyed. color is not a reliable indicator of doneness, especially for ground meats, which can remain pink even when fully cooked. Always trust your thermometer!
Here’s a quick reference chart for common meats:
| Food Type | Minimum Internal Temperature | Rest Time |
|---|---|---|
| Beef, Pork, Veal, Lamb | ||
| Steaks, Chops, Roasts | 145°F (62.8°C) | 3 minutes |
| Ground Meats | 160°F (71.1°C) | (No rest needed) |
| Poultry | ||
| Whole Birds, Parts, Ground | 165°F (73.9°C) | (Whole birds: 3 mins) |
| Ham | ||
| Fresh (uncooked) | 145°F (62.8°C) | 3 minutes |
| Fully Cooked (to reheat) | 140°F (60°C) | (No rest needed) |
| Fish | 145°F (62.8°C) | (No rest needed) |
| Casseroles & Egg Dishes | 160°F (71.1°C) or 165°F | (No rest needed) |
Note: For personal preference, you may choose to cook to higher temperatures, but these are the minimums for safety.
Keeping it Spot-On: Factors Affecting Accuracy
Even the best thermometer can give misleading readings if not used or maintained properly. Understanding what influences accuracy will help you cook with greater confidence.
- Calibration: Over time, thermometers can drift. Regularly checking and calibrating your thermometer ensures it’s always reading true.
- Probe Placement: As discussed, inserting the probe into the wrong spot (like hitting bone) will result in an inaccurate reading.
- Cleanliness: Food residue on the probe can act as insulation, affecting temperature transfer and leading to incorrect readings. Always clean your probe thoroughly.
- Environmental Factors: While less common for meat thermometers, external factors like extreme humidity or dust can affect certain types, such as infrared thermometers, which measure surface temperature. For oven thermometers, ensure they are not touching oven walls or heating elements.
Longevity and Hygiene: Care and Maintenance Essentials
Your meat and oven thermometer is an investment in better cooking. Proper care not only extends its lifespan but also ensures it remains hygienic and accurate.
Cleaning Your Thermometer
This is non-negotiable for food safety. After every use, especially when dealing with raw meats, thorough cleaning is essential.
- Immediate Wipe: As soon as you remove the probe from the meat, wipe it with a clean, damp cloth to remove any loose food particles before they harden.
- Wash with Soapy Water: Gently clean the probe with warm, soapy water. Use a soft brush or sponge to ensure all residue is removed. Be extremely careful not to submerge digital displays or electronic components in water, as this can cause permanent damage. Focus on the probe tip and stem.
- Sanitize: To prevent cross-contamination, especially after checking raw poultry or pork, wipe the probe with a food-safe sanitizing solution or rubbing alcohol.
- Air Dry: Allow the probe to air dry completely before storing to prevent moisture-related corrosion or bacterial growth.
Proper Storage
How you store your thermometer directly impacts its longevity and accuracy.
- Protective Case: Many thermometers come with a protective sheath or case for the probe. Use it! This prevents damage to the delicate tip and keeps it clean.
- Dry and Cool Place: Store your thermometer in a drawer or cabinet that is dry and cool, away from direct sunlight or heat sources like the stove or oven. Excessive heat can affect internal components or battery life.
- Avoid Rough Handling: Treat your thermometer with care. Dropping it or subjecting it to harsh impacts can knock it out of calibration or damage its internal workings.
Troubleshooting Common Issues
Even with the best care, sometimes things go awry. Here are some common issues and how to address them:
- Inaccurate Readings:
- Calibrate: Perform an ice bath test (more on this next) to check calibration. For dial thermometers, you can often adjust a nut on the back with pliers. For digital thermometers without a calibration function, note the offset and mentally adjust your target temperatures.
- Check Battery: For digital models, a low battery can lead to erratic readings. Replace batteries if needed.
- Inspect Probe: Look for any bends, cracks, or damage to the probe wire or tip. A damaged probe often means it’s time for a replacement.
- Wireless Signal Loss:
- Check Range: Ensure your receiver or phone is within the specified range of the probe.
- Obstructions: Thick oven walls or other kitchen electronics can interfere with signals. Try repositioning.
- Battery: Again, low battery in either the probe or receiver can weaken the signal.
Keeping It Honest: Calibrating Your Meat Thermometer
Calibration is a simple process that ensures your thermometer is reading temperatures accurately. There are two primary methods: the ice bath method and the boiling water method. The ice bath method is generally safer and easier for home cooks.
The Ice Bath Method (Freezing Point):
- Prepare Ice Bath: Fill a tall glass or container with crushed ice, then add cold water until the container is full. Stir well for about 30 seconds to ensure the water reaches a stable 32°F (0°C).
- Insert Thermometer: Place the thermometer probe into the center of the ice bath, making sure the tip doesn’t touch the sides or bottom of the glass. The probe should be submerged at least 2-3 inches for most dial thermometers, or about half an inch for digital instant-read types.
- Read and Adjust: Wait for the temperature reading to stabilize (30 seconds to 1-2 minutes, depending on the thermometer type). It should read 32°F (0°C).
- Dial Thermometers: If it’s off, hold the adjusting nut (usually under the dial) with pliers and turn the dial until it reads 32°F (0°C).
- Digital Thermometers: Most digital thermometers don’t have a manual adjustment. If it’s off by more than 2°F, you’ll need to the difference and adjust your target temperatures accordingly, or consider replacing it. Some digital models do have a reset or calibration button; consult your manual.
The Boiling Water Method (Boiling Point):
This method is useful if you frequently work with higher temperatures. Note that water’s boiling point decreases at higher altitudes. At sea level, water boils at 212°F (100°C).
- Boil Water: Bring a pot of distilled water to a rolling boil.
- Insert Thermometer: Carefully place the thermometer probe into the boiling water, ensuring it is submerged but not touching the bottom or sides of the pot.
- Read and Adjust: Wait for the reading to stabilize. It should read 212°F (100°C) at sea level. Adjust as per manufacturer’s instructions if it’s off. Be extremely cautious as boiling water can cause severe burns.
Calibrate your thermometer regularly, especially if you notice inconsistent cooking results or after it’s been dropped.
JXSRW Pro Tips for Confident Cooking
From my 15+ years in the culinary trenches, I’ve picked up a few extra nuggets of wisdom:
- “Invest in quality. A cheap thermometer might seem like a bargain, but its inaccuracy can cost you a perfectly good meal or, worse, compromise food safety. A reliable thermometer is worth every penny.” – Chef Adrian Vance, JXSRW Lead Culinary Editor
- Pre-program Temperatures: Many digital probe thermometers allow you to pre-program target temperatures for different meats. Use this feature to streamline your cooking process.
- Keep Your Manual: Every thermometer is slightly different. Keep the user manual handy for specific calibration, cleaning, and troubleshooting instructions.
- Multiple Readings: For large cuts like a whole turkey or a big roast, take readings in a couple of different spots in the thickest part to ensure even cooking.
Frequently Asked Questions (FAQs)
Can I leave an instant-read thermometer in the oven?
No, instant-read thermometers are not designed to be left in the oven during cooking. Prolonged high heat can damage their electronic components. Only use leave-in probe thermometers for continuous monitoring in the oven.
How often should I calibrate my thermometer?
It’s a good practice to calibrate your thermometer regularly, perhaps once a month or if you suspect it’s giving inaccurate readings. Always calibrate after dropping your thermometer.
What’s the difference between a meat thermometer and an oven thermometer?
A meat thermometer measures the internal temperature of the food itself to determine doneness and safety. An oven thermometer measures the ambient air temperature inside your oven, helping you verify if your oven’s thermostat is accurate.
Why is my wireless thermometer losing signal?
Wireless thermometers can lose signal due to distance, obstructions (like thick oven walls or other appliances), or low batteries in either the probe or the receiver unit. Try moving closer, clearing obstructions, or replacing batteries.
How deep should I insert the probe into meat?
For most thicker cuts, insert the probe 2-2.5 inches deep into the thickest part, away from bone or fat. For thinner cuts like burgers or chicken breasts, insert it horizontally through the side until the tip reaches the center. Always check your thermometer’s manual for specific depth recommendations.
Conclusion
Mastering your meat and oven thermometer is a culinary major upgrade. It empowers you to cook with precision, ensuring every meal is not only safe but also perfectly cooked to your desired doneness. No more dry chicken, no more undercooked roasts—just consistent, mouth-watering results every single time. By understanding the different types, proper usage, care, and calibration, you transform a simple tool into an extension of your culinary expertise. Embrace the thermometer, improve your cooking, and join the community of confident chefs who trust JXSRW for all their kitchen wisdom. Happy cooking!
Frequently Asked Questions
Can an instant-read thermometer be left inside the oven during cooking?
No, instant-read thermometers are not designed for continuous use in the oven. Their electronic components can be damaged by prolonged exposure to high heat. Only leave-in probe thermometers are suitable for monitoring food temperatures throughout the cooking process in an oven.
What is the recommended frequency for calibrating a meat thermometer?
It is good practice to calibrate your meat thermometer regularly, ideally once a month, or whenever you suspect it might be providing inaccurate readings. Always recalibrate your thermometer if it has been dropped, as this can affect its accuracy.
What is the key difference between a meat thermometer and an oven thermometer?
A meat thermometer measures the internal temperature of the food itself, ensuring it reaches a safe and desired level of doneness. In contrast, an oven thermometer measures the ambient air temperature inside your oven, helping you verify the accuracy of your oven's built-in thermostat, which can sometimes be off by 25-50u00b0F.
Why might a wireless meat thermometer experience signal loss?
Wireless thermometers can lose signal due to several factors, including excessive distance from the receiver, physical obstructions like thick oven walls or other kitchen appliances, or low battery levels in either the probe or the receiver unit. To improve signal, try moving closer, removing obstructions, or replacing batteries.
What is the correct depth for inserting a thermometer probe into meat?
For most thicker cuts of meat, insert the probe 2 to 2.5 inches deep into the thickest part, ensuring it avoids bones or large pockets of fat. For thinner cuts like burgers or chicken breasts, insert the probe horizontally through the side until the tip reaches the very center. Always consult your specific thermometer's manual for precise depth recommendations.
Calibrate Your Meat Thermometer Using an Ice Bath
Ensure your meat thermometer provides accurate readings by performing a simple ice bath calibration. This method checks the freezing point of water.
Fill a tall glass or container with crushed ice, then add cold water until the container is full. Stir the mixture well for about 30 seconds to ensure the water reaches a stable temperature of 32u00b0F (0u00b0C).
Carefully place the thermometer probe into the center of the ice bath. Make sure the tip does not touch the sides or bottom of the glass. The probe should be submerged at least 2-3 inches for dial thermometers or about half an inch for digital instant-read types.
Wait for the temperature reading to stabilize, which typically takes 30 seconds to 2 minutes. The thermometer should read 32u00b0F (0u00b0C). If it's a dial thermometer and off, use pliers to turn the adjusting nut until it reads 32u00b0F. For digital thermometers, if it's off by more than 2u00b0F and lacks a calibration button, note the offset or consider replacement.
Cooking gear we tested in our own kitchens
Practical specs, not advice. Unsubscribe anytime.
This thermometer has been a game-changer for my baking and roasting. I used to struggle with overcooked pork, but now I can pull it out at just the right moment. The clear readings make it so easy to ensure everything is cooked safely and tastes amazing. Highly recommend for anyone who wants to take the guesswork out of cooking.
I finally broke down and bought a good meat thermometer after years of guessing. This guide really helped me understand the importance of carryover cooking, which I never really considered before. My last roast chicken was the juiciest I’ve ever made, hitting that 165°F perfectly. No more dry poultry for me!
The thermometer itself is pretty good for the price, and it definitely helps with knowing safe internal temperatures. My only complaint is that the probe cable is a bit short for my large smoker. It works fine for the oven, but I wish it had a longer reach for bigger cuts of meat on the grill.
As someone who cooks a lot of different meats, having a reliable thermometer is key. I appreciated the tips on strategic probe placement; it’s something I thought I knew, but I picked up a few new tricks. It’s made a noticeable difference in the consistency of my steaks and roasts. Definitely a kitchen MVP.